Is Mavis the best free video camera app for iPhone?
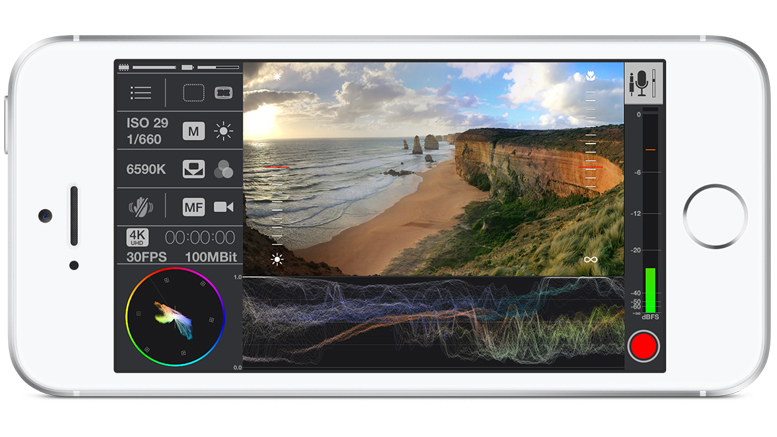
Mavis is a fully featured free video camera app for the iPhone. It is similar to Kinomatic and Filmic Pro in that it gives your iPhone many manual controls to help you shoot better video. Recently the designers updated the app to give it many new features. In the new version they have redesigned many tools to give the app greater use in video production.
New audio improvements
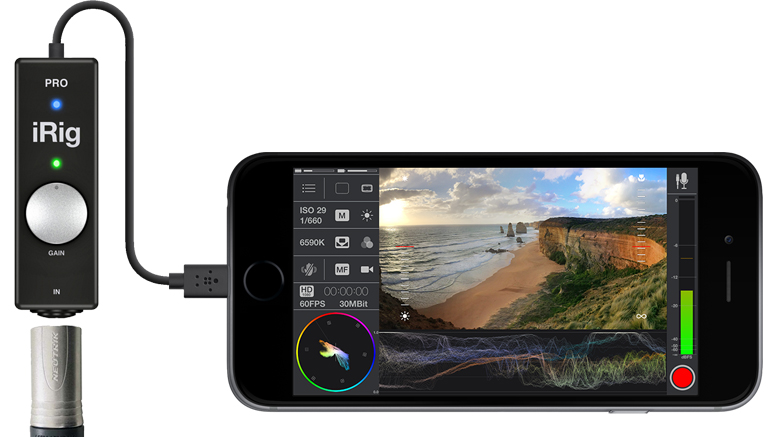
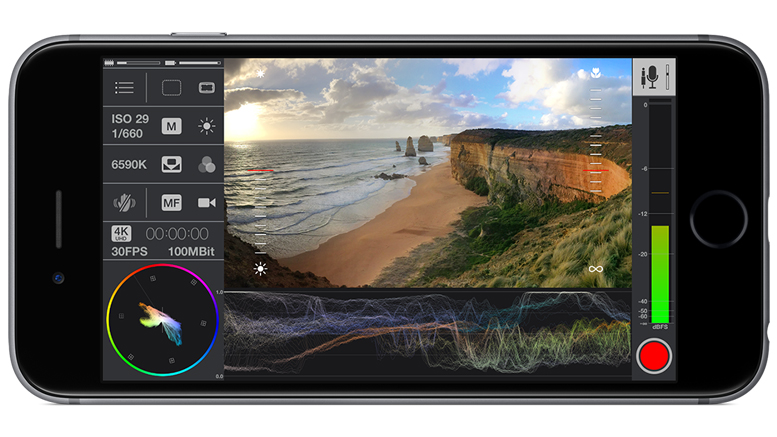
The new audio engine gives full support for internal and external audio sources. You can connect a microphone by the lightning port or the headphone port and use Mavis to monitor and record the incoming audio. The app also has audio gain control for both internal and external microphones so you can have full control over your levels. You can also see where your audio is peaking with the VU meters.
Real time audio pass through
Another great feature in Mavis is real-time audio pass through. This means that if your microphone is capable of audio monitoring you can add headphones so you can hear the audio as it records. This is useful for making sure your audio records to a high standard.
Updated viewfinder
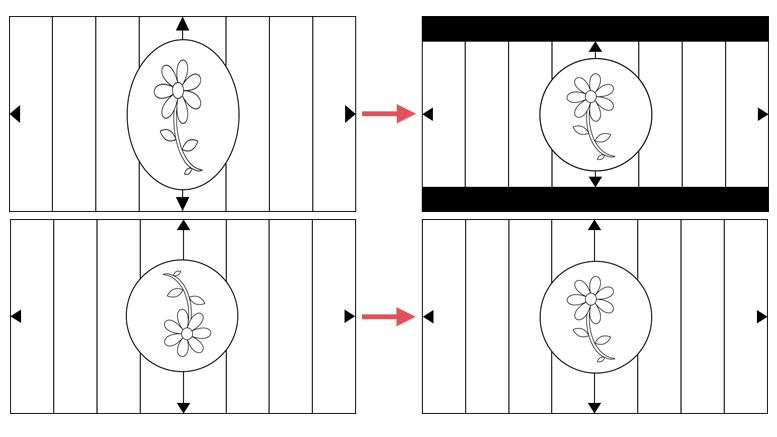
The updated viewfinder now has support for Moondog’s Anamorphic lens and the Beastgrip DOF adaptor. This de-squeezes the image so you can see the image clearly after the lens correction. This makes framing shots a lot easier when using hardware accessories. This only manipulates the viewfinder not the recorded media. This means you will still have complete control over the method you use to de-squeeze your recordings in post-production.
Waveform monitor
The waveform monitor helps you to shoot with the optimum dynamic range. You can ensure this by keeping a good vertical spread of your waveform. White and black peaks that flatten out show over and under exposed portions of video where the dynamic range exceeds. Its purpose is to show the detailed brightness of what you are recording.
You can control the waveform by adjusting the ISO or shutter speed to remove the peaks and troughs. If that doesn’t work you may have to look at you lighting set up.
Colour control
Mavis has full colour control and gives you extensive manipulation over your image. The built in vector scope will help set up your colour values and your blacks and whites for perfect image exposure. This will show precise colour analysis of your scene as the iPhone camera sees it. You do this by setting a white or grey surface to the centre of the vector scope, it will then measure it to give you an accurate representation of white. You can also set the colour of an object to a consistent angle of the vector scope. This will ensure you always have consistency regardless of the white point.
4k Resolution
There are plenty of resolution settings in Mavis. You can record in resolutions up to 4k with bit rates up to 100 mbs. You can also select different frame rates from 3fps up to 240fps. You store these in quick set-up modes so you don’t have to keep inputting settings. Video files save to the camera roll and in the Mavis app. You should be aware though that high resolution recordings only save to the Mavis app and not the camera roll.
Conclusion
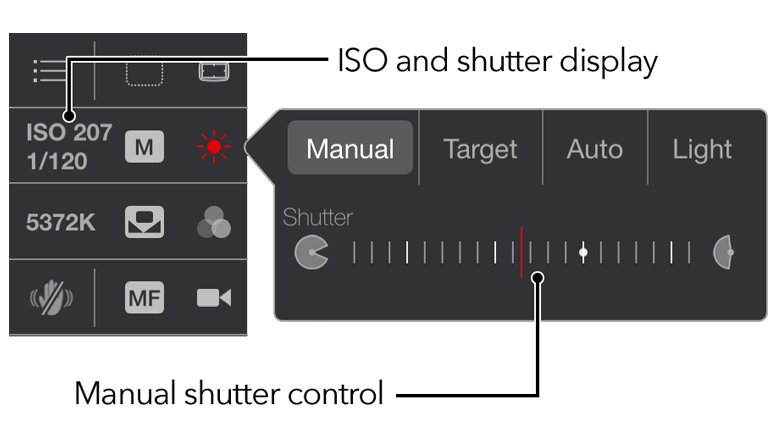
Mavis works best in manual mode so it might not be suitable for the beginner. That said the focus and exposure controls are easy to use while shooting. If you are not in manual mode these displays show you what the exposure and focus are doing. Adjusting them immediately switches the app into manual mode. Menus on the left-hand side give quick access to various functions including the exposure and focus settings. I would say that this app is aimed at the professional and if you are serious about your iPhone filmmaking this is a good place to start.
App: iPhone only
Price: Free with in app purchases
Other Popular posts like this:

